>>> Ze Back Story <<<
(if you'd rather not listen to me babble, skip down to Ze Instructions)
Two and a half years ago, I was in a wedding planning frenzy. Pretty much everything that came out of my mouth was wedding related. My conversations went kinda like this:
"How are you today?"
"Oh, I'm pondering the difference between ballerina or cotton candy pink ... "
"Did you want fries with that?"
"I don't know. Will they lead to wedding dress zipper not zipping up DISASTER?!?"
It was pretty bad. But I really enjoyed the process, even if everyone around me did not.
One of my favorite parts was creating wedding invitations. My very talented aunt offered to calligraph (is that a word?) for FREE, so I decided to go all out. There were multiple inserts and ribbons and little golden aspen leaf charms and vellum envelopes and best of all, a gold wax seal on each one And lest you think I was an evil money-eating bridezilla, we only sent out sixty of them. (Our whole wedding was less than $3,000, in fact. Someday I need to write a post about how we managed that.)
Anyway, the task fell to me to search out special gold wax for the seal and a low-heat glue gun (I had no idea those even existed) and the little stamper doohicky. I spent hours searching and finally came across a crafting site (whose name I do not recall) with everything I needed for $50. It was kind of stupid to spend $50 just for wax seals, but my self-induced wedding craziness blinded me to that little bit o' common sense.
I was not as amazingly amazing back then.
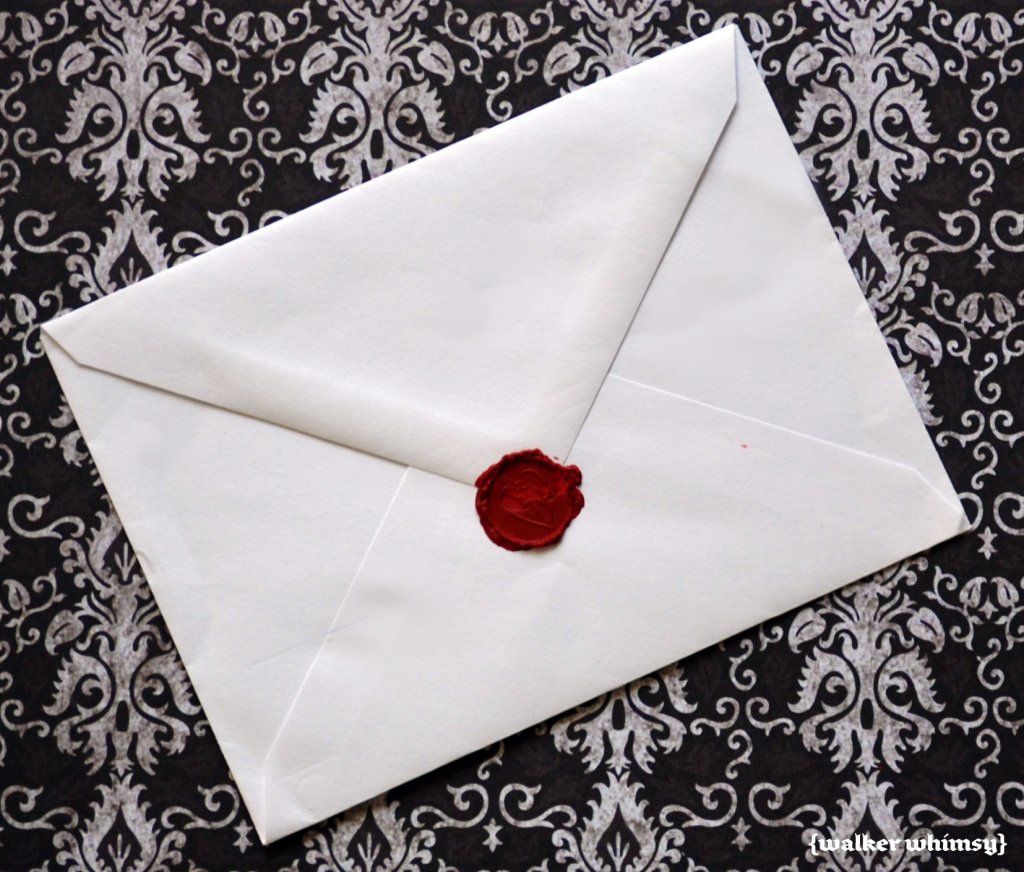
When I was creating the melted heart valentine, I had an epiphany. What if I used the same method to create a wax seal on an envelope? I could save another bride (or other crafty person) money! I could help them add a little something extra to those beloved invitations! I just had to try it out, and unlike J Lo's cleavage tape at the Oscars, it WORKED!
>>> Ze Instructions <<<
Materials:
crayons in the color of your choice (they come in every hue, so be specific!)
a candle
matches or a lighter
something to stamp the wax with*
*I used the stamper doohicky left over from my wedding. You can either buy one at a craft store, use a cute stamp, use something random you have around the house like a piece of jewelry, or make a personalized one using this tute.
I recommend practicing this technique first so you don't ruin any of your precious invitations. It truly is so easy a caveman could do it, but it's better to be safe than sorry!
1.Gather your materials. I recommend sealing your beloved invitations the old fashioned way first (lick 'em and stick 'em) just in case of any rough handling by the P.O.
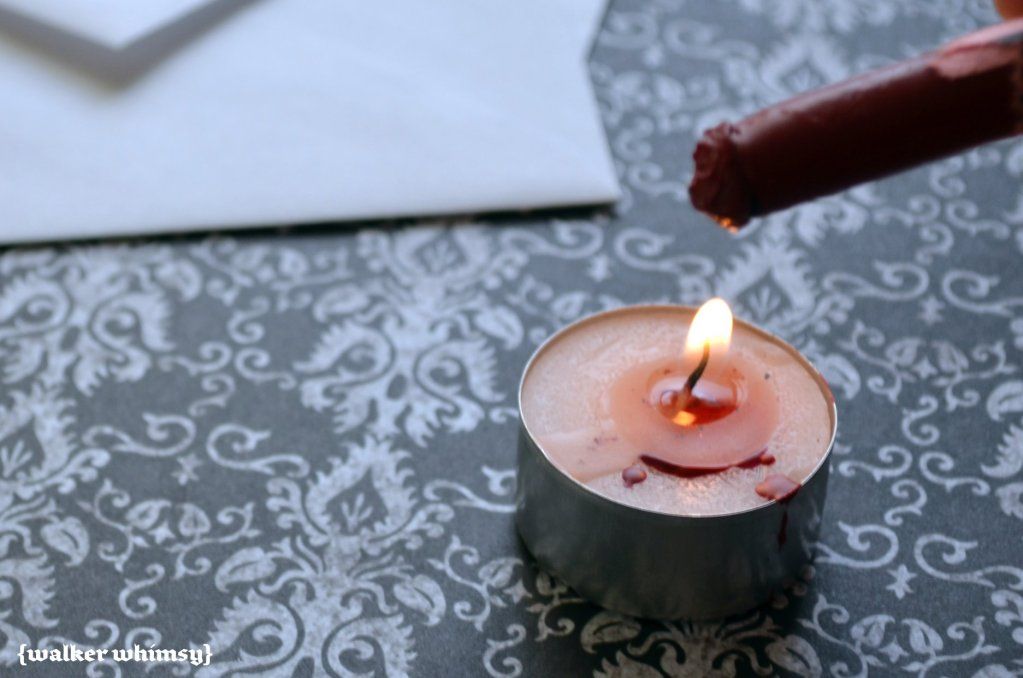
2. Light your candle. (If you are like me, you may yell, "BEHOLD, I GIVE YOU FI-YAH!" a la Sid from Ice Age. Or not.)
3. Tear the paper off your crayon. Hold the now-nekkid crayon about an inch from the candle flame until it gets all melty.
4. Quickly position the crayon over your envelope and let the wax drip into a nice puddle in the proper place. If it's not dripping enough, you can roll the end of the crayon around on the envelope to get more wax to stick. Also, I found it easiest to move the envelope to the crayon instead of vice versa.
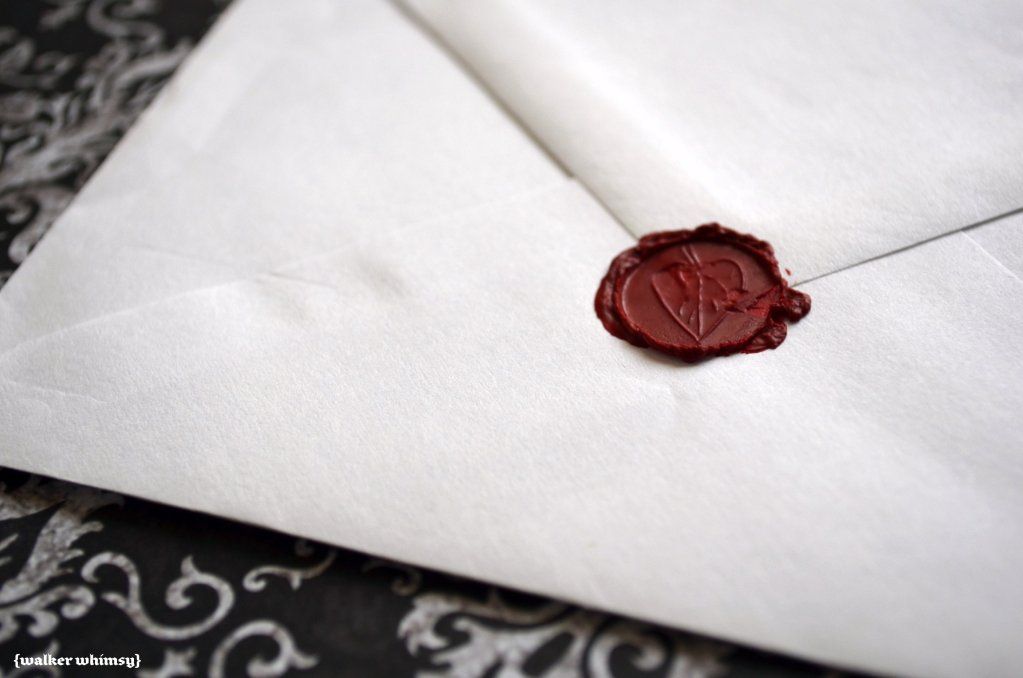
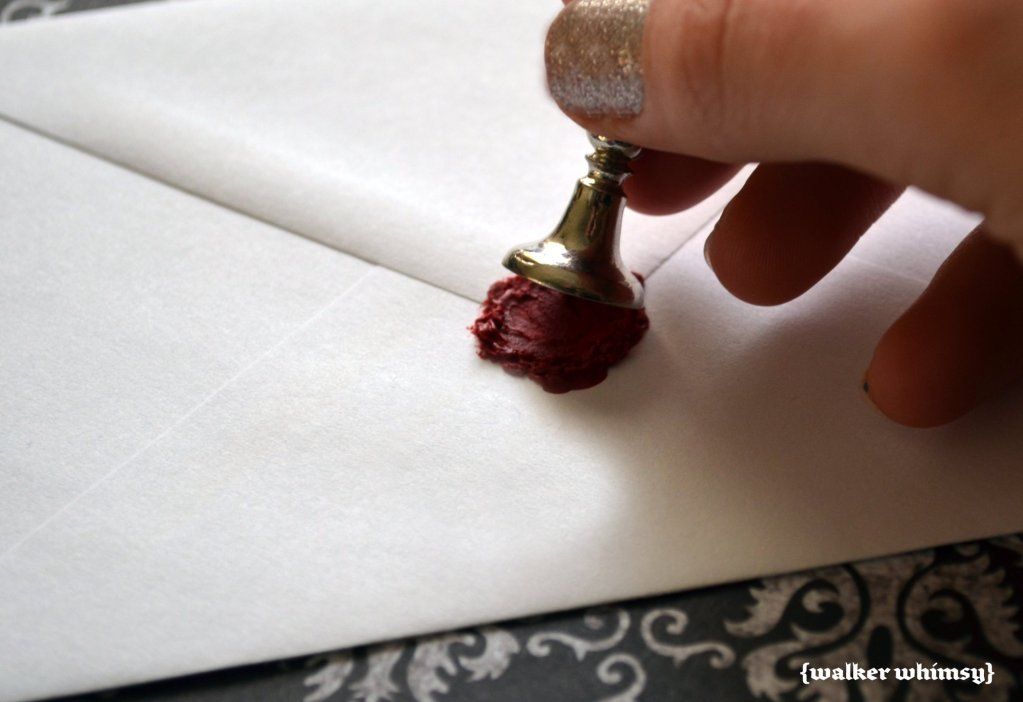
5. Stamp the wax puddle with your stamper doohicky or other item.
Voila! A DIY wax sealed envelope!